
Designing
Operational models in designing NBS to learn from
-
Aarhus has developed several thematic design guidelines, among others:
-
The Technical Handbook of Malmö includes a set of type drawings for a variety of NBS (available also Computer Aided Design (CAD/.dwg) formats. As a significant resource the handbook clearly outlines the complex system of roles and responsibilities of different stakeholders and municipal authorities across the project cycle. The guidance provided in the technical handbook is integrated to the regulatory frameworks and institutionalized processes of the city. The handbook interlinks to Swedish AMA guidance (standardized technical specifications for construction) and VGU (standardized technical specification for road and street construction).
-
Tampere has prepared Design guidelines for nature-based solutions. The guidance includes decision support for selecting an appropriate solution that consider different boundary conditions and characteristics of the site. The different aspects that are considered in decision making are a) Groundwater levels; b) Soil conditions; c) Space requirements; d) Stormwater quality outcomes and e) Catchment size.
In addition to this, the design guidelines include info-charts about the different archetypical NBS solutions. Guidelines covers the following topics: 1) Utilization of stormwater; 2) Infiltration; 3) Biofiltration; 4) Underground systems; 5) Storage systems; 6) Wetlands; 7) Swales/ditches.
-
Stavanger has a guideline, named Climate and Environmental Plan 2018-2030. This guideline offers a strategic plan to address climate change and improve the city’s sustainability. The ambition is to make Stavanger a green, climate-friendly and climate-robust city. The plan aims to protect and conserve areas of natural importance and ensuring the viability of biodiversity in urban areas. The Climate and Environmental Plan for Stavanger also includes a set of strategies for stormwater management.
Building blue-green infrastructure for stormwater management is also included in the plan. This strategic plan is the first legal document of Stavanger Municipality that introduced NBS as part of local climate and environmental plan.
Different solutions
Take a look what nature-based solutions look like in different cities. Click the images to see more details.
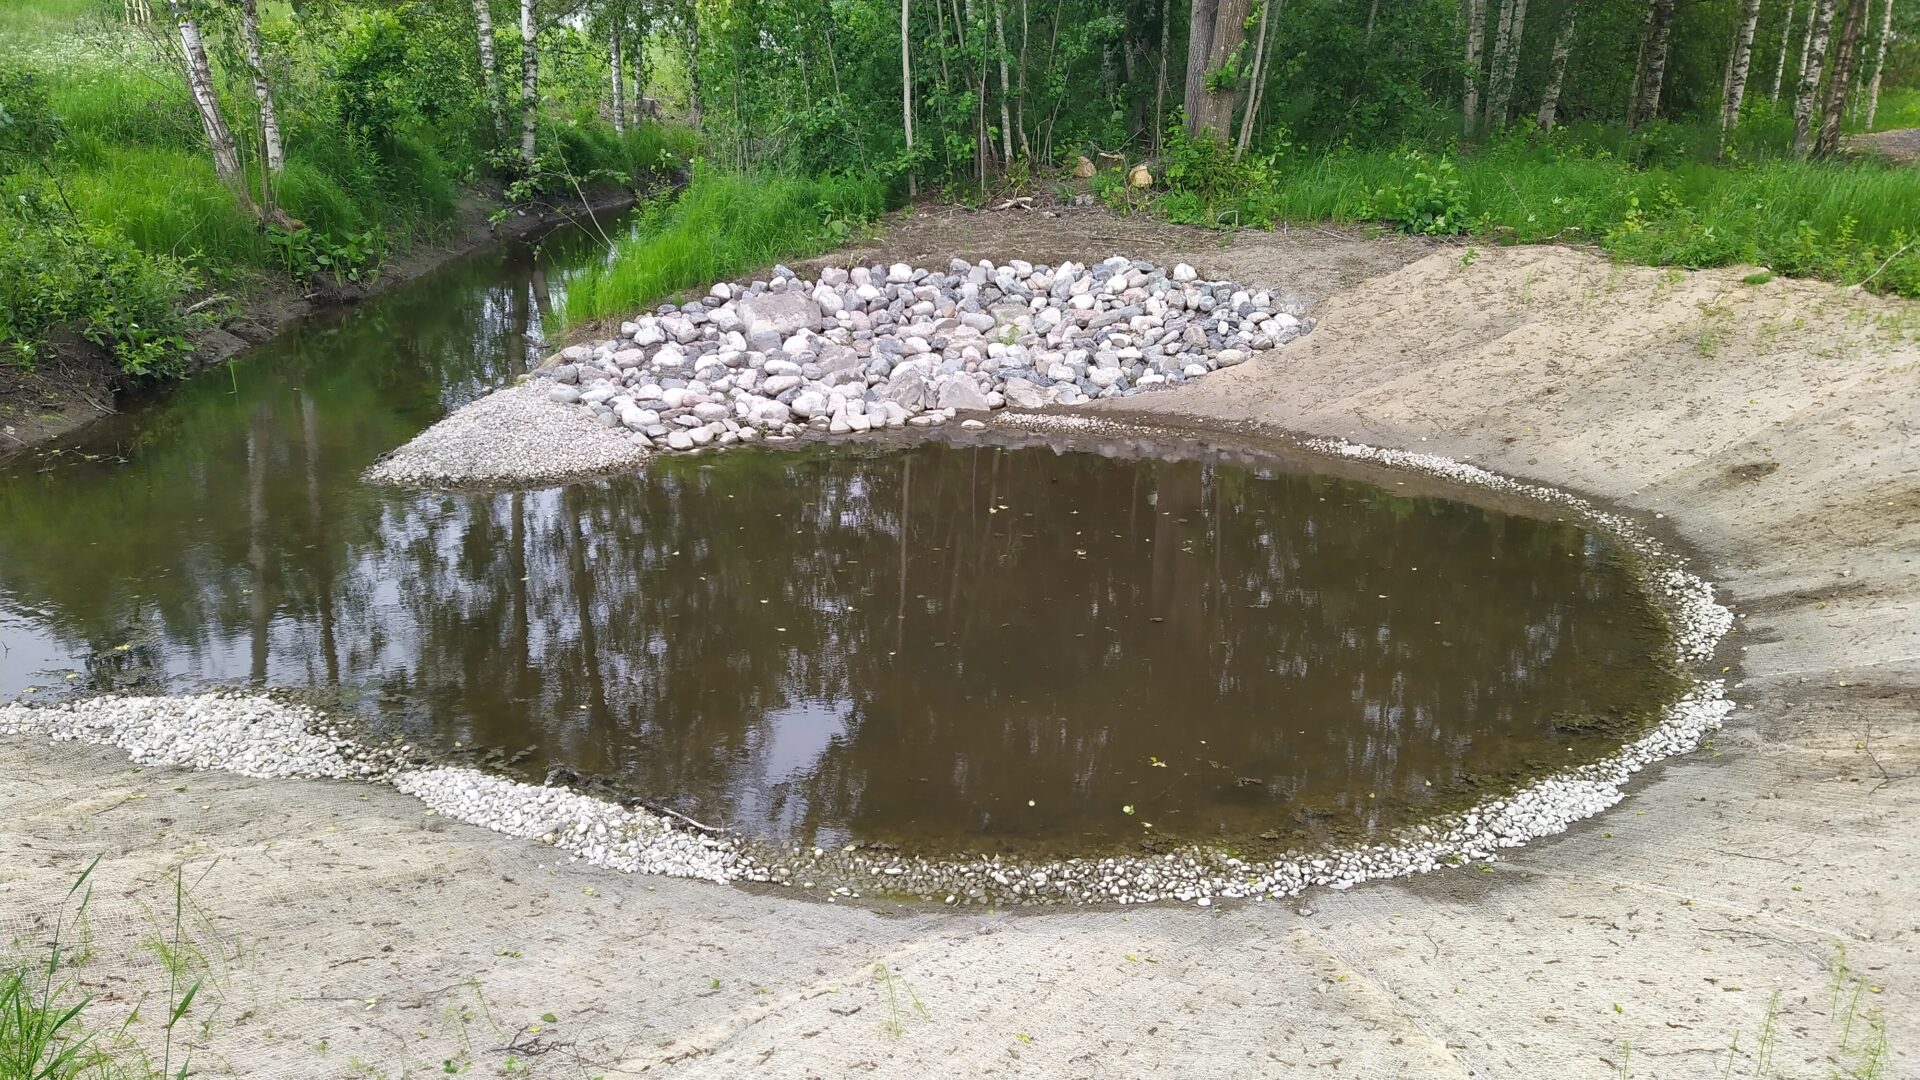
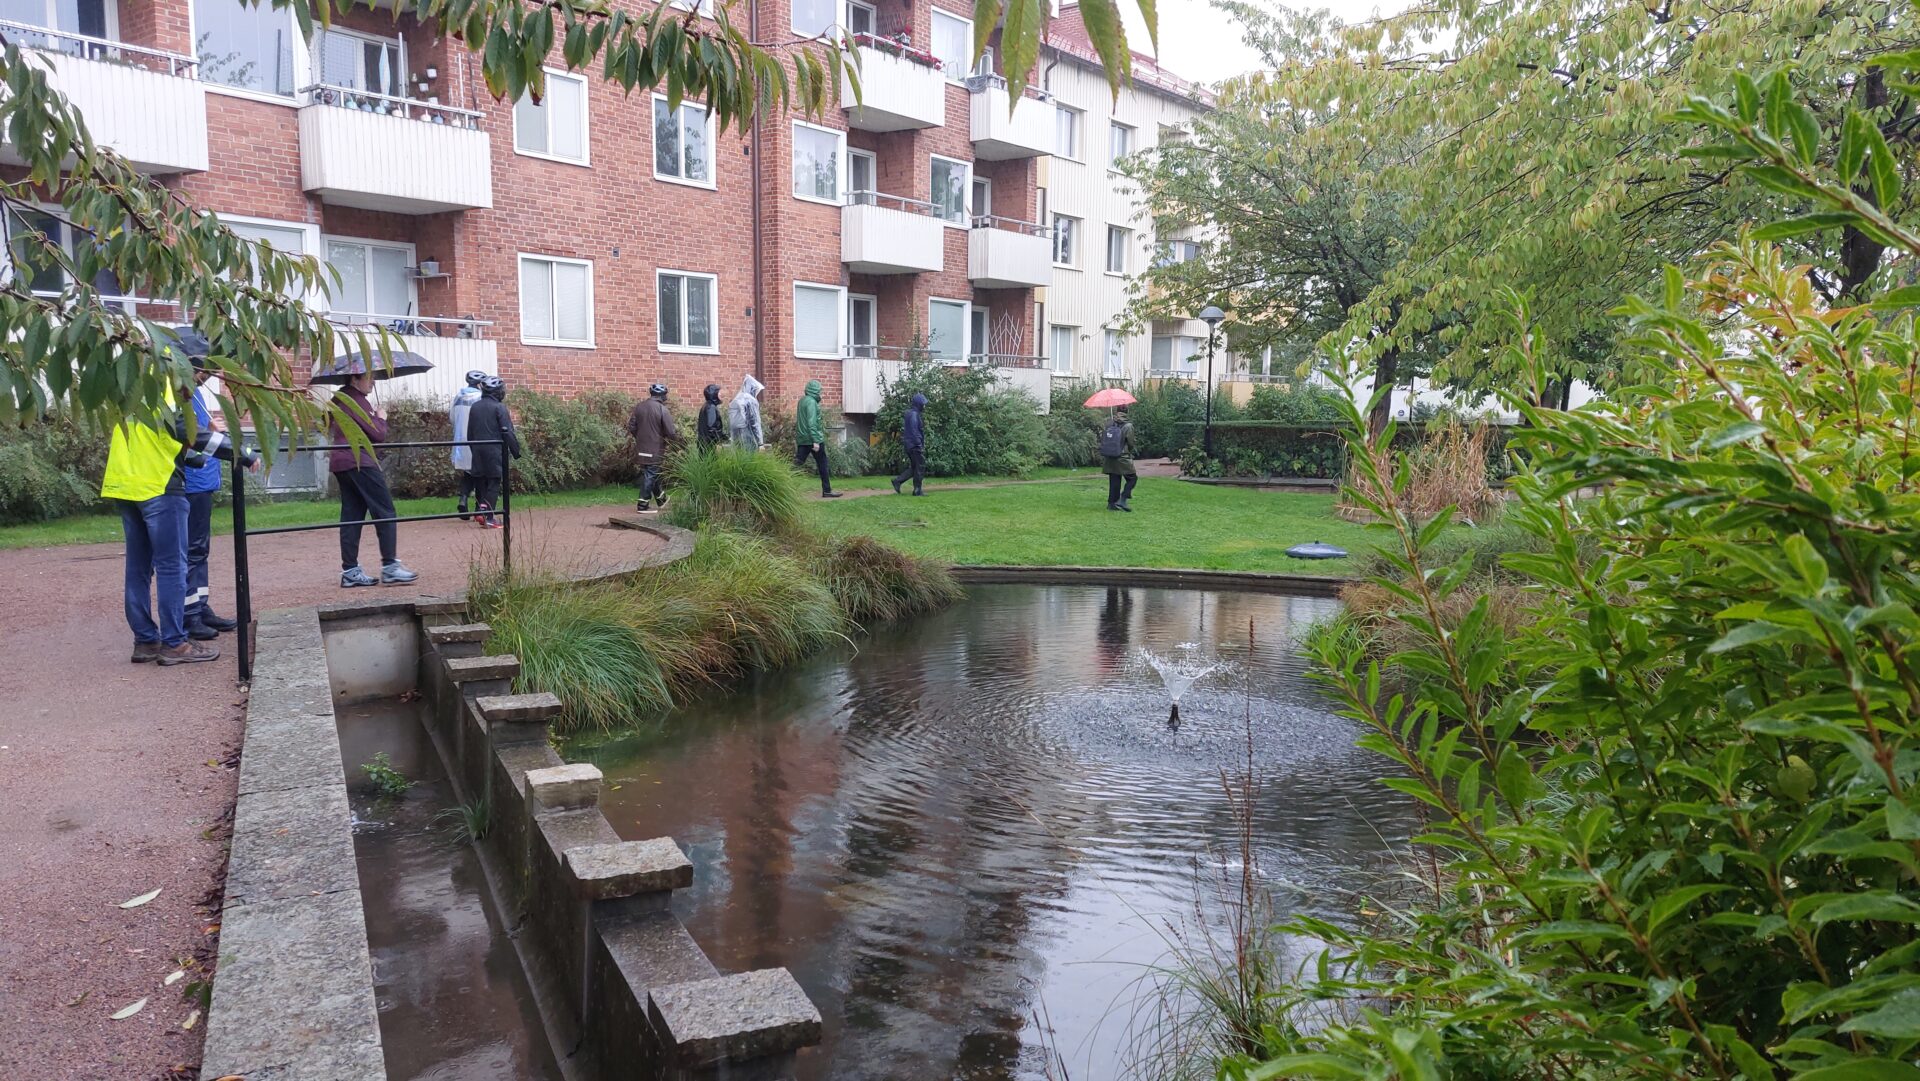
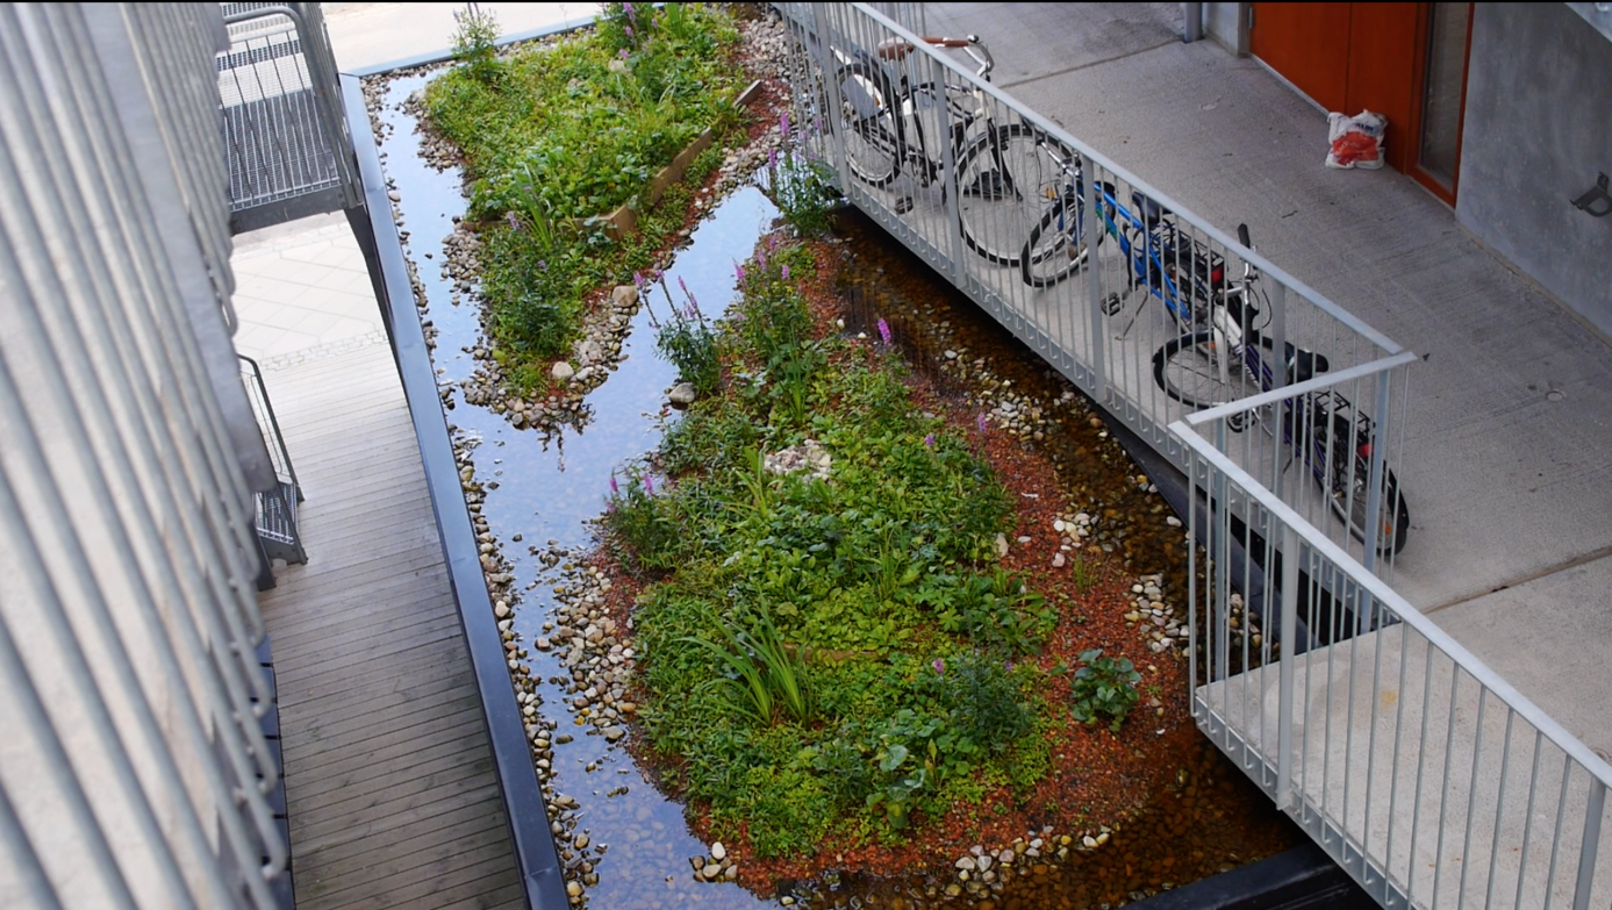
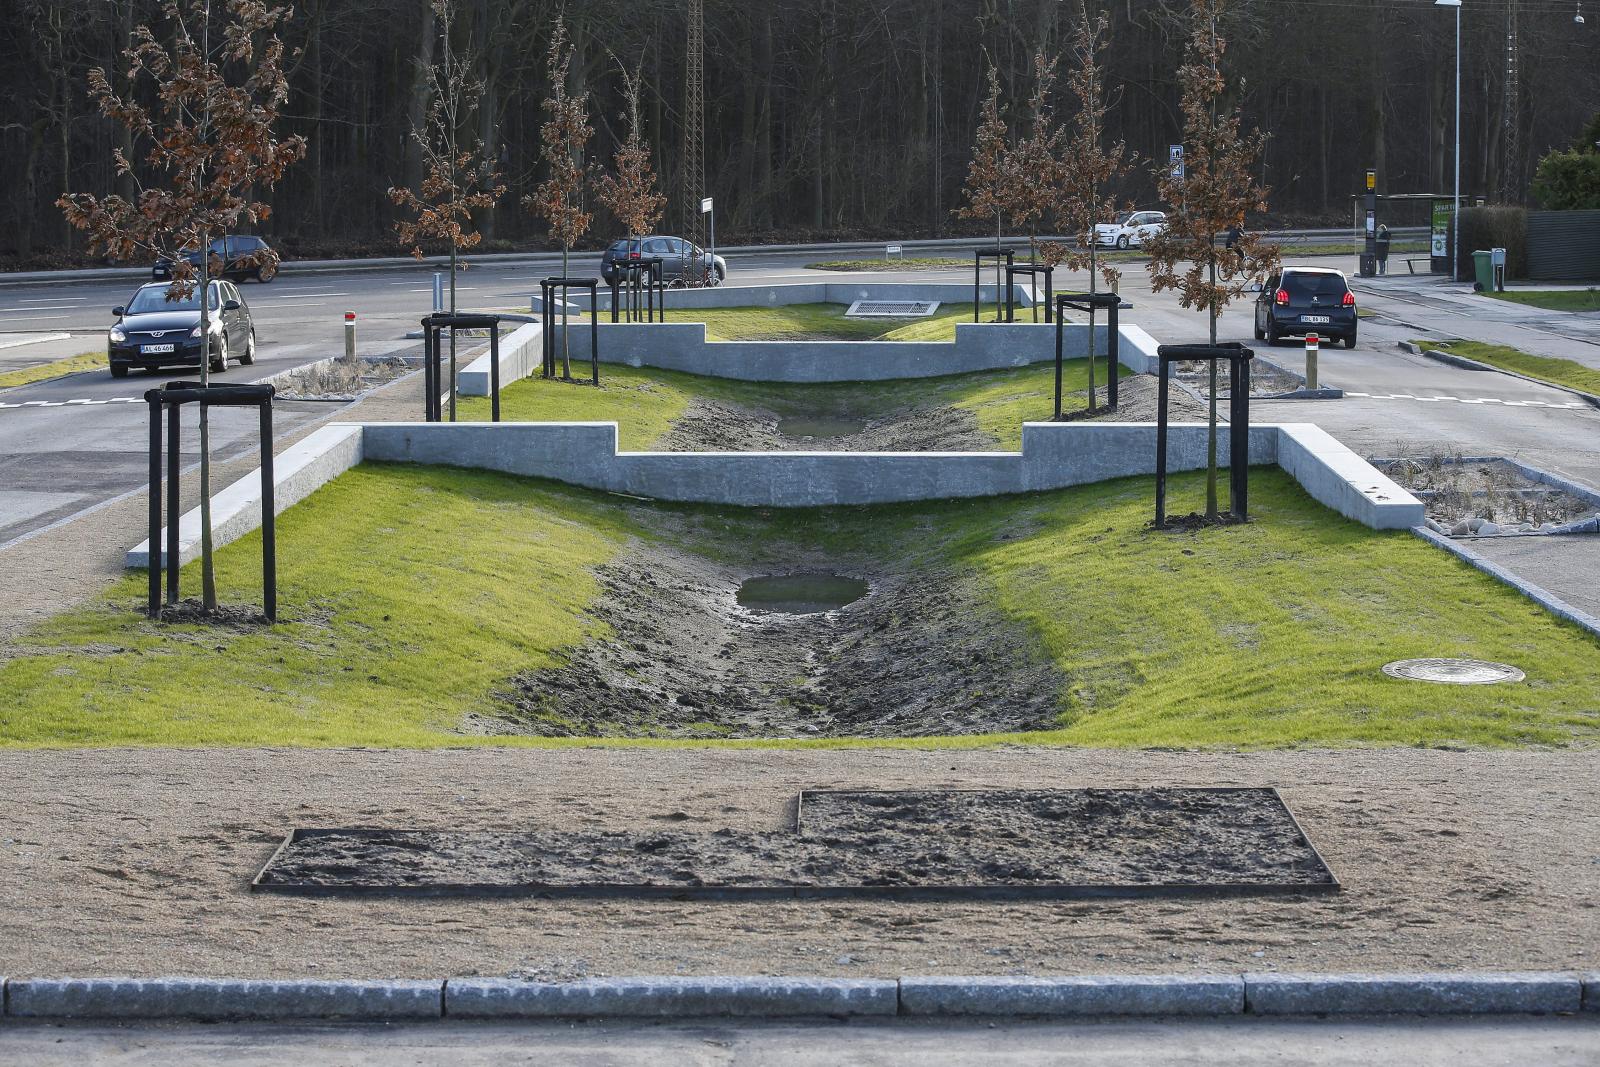
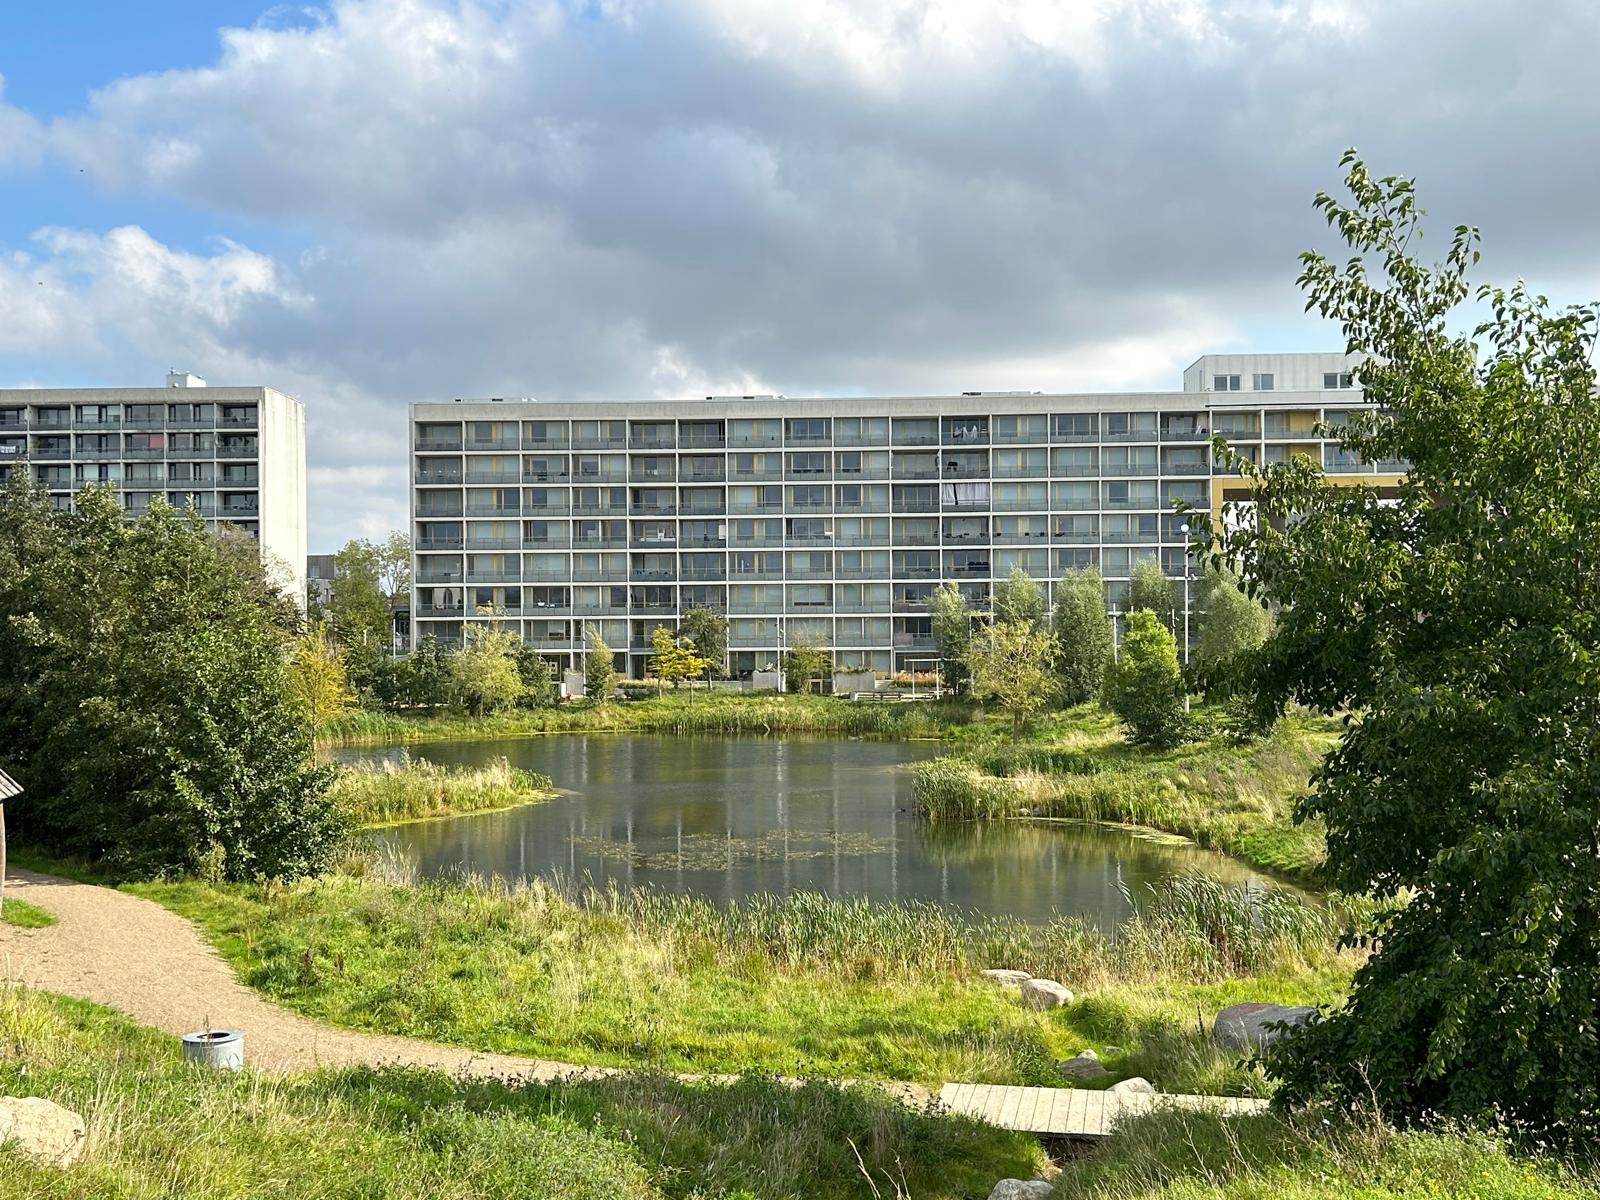

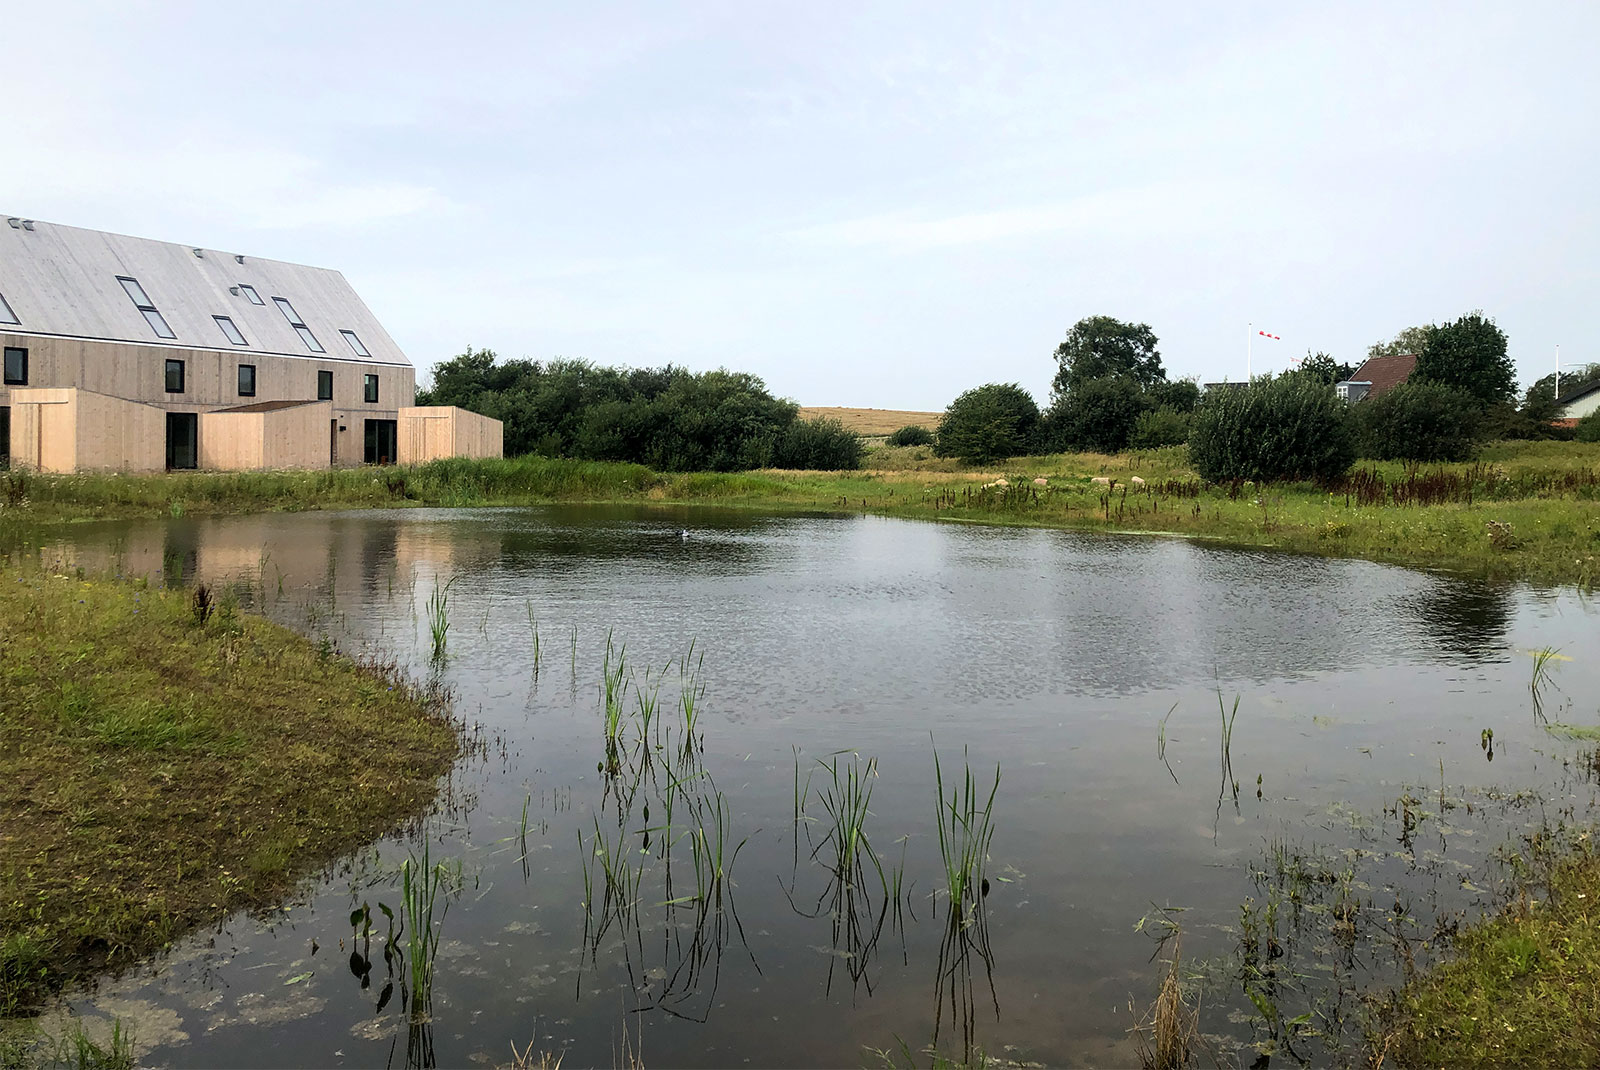
What to consider before establishing a solution: case rainwater ponds by the City of Aarhus
-
Rainwater ponds are basically planned based on a supply need. Rainwater ponds can become much more than functional technical facilities. With the right planning right from the start and with the right involvement of stakeholders, you can achieve great value for the local area in which you establish the pond. Where it makes sense, there should be a focus on ensuring the involvement of the right administrations in the municipality, citizens, institutions, associations and other stakeholders, etc.
In the initial planning of the pond, it must be ensured that the municipality’s planning basis for the local area in question is screened for issues that may have an impact on the project. In addition to the legal and technical conditions applicable to the area, there may be special plans, strategies, policies and visions that help to set the framework for the ponds’s role in the local environment.
The first step in a given project is to investigate the physical conditions in and around the site. Among other things, it must be investigated whether the area is suitable for infiltration, whether there are drinking water interests to take into account and much more. Below is a list of some of the physical conditions that should be investigated:
- Soil condition
- Contaminated soil
- Groundwater level
- Drinking water wells
- Soil contamination
- Terrain conditions
- Protected nature
- Natura 2000 protected nature
- Drains, cables and pipes
- Invasive species
- Protected dikes and stone walls
- Recipients is there a possibility of overflow to nearby recipients
- Flow paths (Cloudburst map, 10-year event, 100-year event)
- Critical Elevations (Flood Risk)
- Usable open areas for flooding (e.g. parks and playing fields)
- Blue spot mapping
- Hydraulic surface calculation
- Drainage model
- Drainage models and surface models combined
- Combined one-dimensional drain model and surface model (1D-1D)
- Combined Drain Model and Two-Dimensional (2D) Surface Model (1D-2D)
- Combined Drainage, Surface, Groundwater and Ocean Model (1D-2D)
-
The physical location of the pond should be clarified in collaboration with the municipality already in the start-up phase of local planning. As far as possible, it should be avoided to place the basin in areas with protected habitats, protected areas, areas with ancient monuments, areas with high groundwater levels or areas with contaminated soil, as such locations can complicate, increase the cost and prolong the process of establishing the basin considerably.
-
The stowage volume of basins is dimensioned based on general functional practice and the Wastewater Committee’s writings. Specifically for the dimensioning of the basin volume, the Wastewater Committee’s publication 30 is used. Reference is also made to the Wastewater Committee’s publications 27-30, which can be found on the Wastewater Committee’s website.
-
Drainage inflow should generally be directed around the basin. If there are too high costs associated with this, the outlet must be increased by the average amount of drainage. If drainage water is passed through a basin, it will reduce the pond’s ability to purify the water. It is therefore not enough simply to increase the expiry accordingly.
Groundwater/percolation
It is important to check whether a planned basin is located within an area of special drinking water interests, in the water catchment area or within 300 m of water wells. In such cases, the authority often requires a tight basin bottom to protect the groundwater. If the basin is not located within one of the above areas, it is possible to investigate via geotechnical drilling whether the soil conditions are suitable for infiltration. In cases where the groundwater table is higher than the basin bottom, the basin must be secured against buoyancy.
Drilling Protection Areas (BNBO)
If the basin is established near borehole protection areas (BNBO), any distance requirements and measures are agreed with the waterworks in question and the municipal authority before final location is determined.
-
The access conditions could possibly be thought of together with a recreational use of the area, such as a footpath around the pond. There should always be space set aside for a sewer cleaner to reach any inlet structures, sand traps and outlet structures. At the same time, the utility’s own staff must have the opportunity to drive to the pond to inspect and maintain technical installations, electrical panels, wells, constructions, etc.
If possible, there must be room for the pond to be cleaned, which requires that large construction machines have access to the area. If possible, an area along the edge of the pond should also be set aside for intermediate landfill of sediment for drainage in connection with the clean-up.
-
There are many regulatory issues that the utility employee must deal with before the actual establishment of the rainwater basin can begin. Below are some of the most important ones:
Wastewater plans
Land registers affected by a sewer project should be described in a wastewater plan or in an addendum to a wastewater plan before the sewer project can start. If land registers are to be expropriated or acquired on expropriation-like terms, then the land registers must appear in the wastewater plan or an addendum to a wastewater plan.
Discharge permit
Before the start of the construction work, an approved discharge permit must be obtained. It may be a good idea to start the dialogue with the municipality early in the process.
A discharge permit should be applied for before the detailed design of the ponds begins, as the permit informs about the functional requirements that will apply to the pond in relation to e.g. outlet (l/s), repetition periods and safety factors. It is also recommended to incorporate conditions for future cleaning and operation of the pond and the basin areas (maintenance plan, operation and maintenance of rainwater ponds) in the discharge permit, so that future conflicts are avoided when the pond has achieved the status of nature protection area according to Danish Nature Protection Law.
EIA-screening
In connection with the establishment (or modification) of dry and wet ponds, an EIA screening must be performed. If the project has a significant impact on the environment, it is subject to an EIA. It is the utility company that must carry out and submit the EIA screening to the municipality in question.
Nature Protection Law
A special exemption must be granted if the pond is to be located in or near nature protected area according Nature Conservation Act.
Land zone permit
If a basin is placed in a rural zone, a rural zone permit must be applied for in accordance with the Planning Act.
Soil Moving Permit
If the basin is to be built on soil that is not intact (clean soil), earthmoving permission must be obtained from the municipality. In the case of a mapped area, soil samples must be taken and a soil management plan prepared in agreement with the municipality.
Heritage conservation
Before the excavation work begins, it is worth considering whether the local museum should be asked for an opinion on whether the planned work will entail a risk of destruction of significant ancient monuments, acc. Dansh heritage conservation Law
In the case of minor construction work, the museum must bear the cost of this investigation, in the case of larger works that require a major preliminary study, the cost is borne by the developer.
In the advance statement, the museum can release the area. If the area is released, the developer will not be held financially responsible if significant ancient monuments are found during the work, and the state will pay the costs associated with any additional investigations.
If the area is not released initially, the state may require that construction work only begin after an archaeological investigation has been carried out. Smaller studies are paid for by the museum, larger studies are paid for by the developer.
Alternatively, you can avoid obtaining a prior statement from the museum. In that case, the developer bears full responsibility for any ancient monuments found. If ancient monuments are found during the excavation work, the work must be stopped and the museum notified. If the museum has not been asked for a statement in advance, all expenses associated with the halt of the work and any archaeological investigations will be borne by the developer.
Concrete design examples
Rainwater harvesting pond
A guide by the City of Aarhus.
-
The wet rainwater harvesting pond has a permanent water table (the permanent wet volume) and at first glance may look like a lake or a water pond.
The outlet from a wet rainwater pond is regulated (throttled) to protect watercourses from erosion and hydraulic overload. The water level in the pond will therefore vary (storage volume) depending on whether it rains or not. The wet rainwater pond is effective both when it comes to storing and purifying rainwater.
The good cleaning properties are due to the fact that the rainwater stays in the basin for such a long time that both settling and (limited) treatment will take place through biological turnover linked to bacteria. This means that the discharge of nutrients, xenobiotic substances and heavy metals to the recipient is reduced.
The wet rainwater basin can advantageously be zoned as desired. Most often, the division takes place so that the first zone acts as a sand trap.
A rainwater harvesting pond designed according to Best Available Techniques (BAT) is constructed to efficiently collect, store, and manage runoff while minimizing environmental impact. Such systems typically include pre-treatment for sediment removal, controlled inflow and outflow, and features that improve water quality, such as natural filtration. The design ensures compliance with environmental standards, including the Industrial Emissions Directive, while supporting sustainable water management.
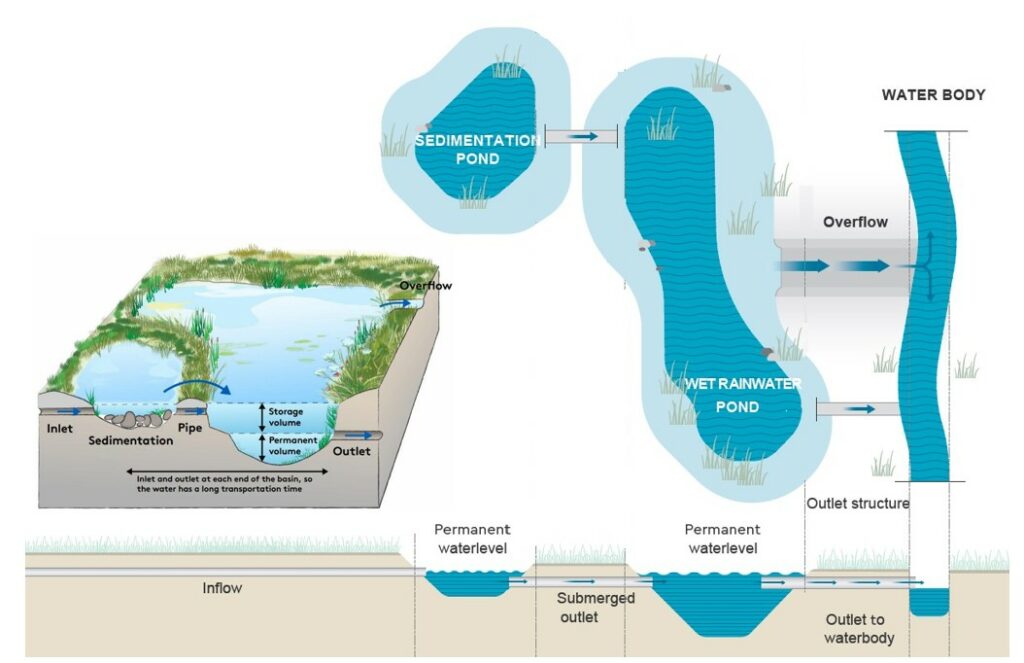
A structural design of a rainwater harvesting pond.
-
In the water plans, it is determined how much wet volume a wet rainwater pond should have. Around 200 – 250 mb3 is required per red. ha catchment area to achieve the greatest possible treatment effect. If more than 250 mb0 wet volume is established, no further cleaning effect is achieved.
However, the above does not take into account the cleaning that takes place in the delay volume. If you need a more precise calculation of a pool’s cleaning capacity, you can advantageously use programs such as WDP.
In connection with the dimensioning of wet volume, it is important to keep in mind that the largest particulate cleaning takes place during the small frequent rains (First Flush). In the case of repetition periods over 1/2 – 1 year, there will not be any significant purification, as less substance is released in relation to the amount of water.
In the section on cleaning measures it is possible to read about the individual basin components such as sand traps and front basin.
-
A pond is desired for a catchment area of 10 hectares with a degree of fastening of 50%, which results in a paved area of 5 hectares.
Based on the above, the wet volume is calculated: First, the hydrological reduction factor is selected. In the example, a hydrological reduction factor of 1.0 has been used.
250 m3 per reduced hectare catchment area X 5 ha = 1,250 m3
Then use the associated spreadsheet for the Wastewater Committee’s publication to find the required stowage volume.
Coordinates for the current area are entered. The safety factor is entered (typically 1.0 – 1.3).
The cut-off pipe capacity (l/s) (the drain number) is entered. Drain and overflow frequency (recurrence period) must be entered – (to be agreed with the environmental authority). If necessary, investigate the possibility of a variable drain. In the present example, the maximum discharge is based on 1 l/s ha.
Paved area: enter
Hydrological reduction factor: (typically 0.8–1.0).
For coupled ponds and larger rainwater systems, it is recommended to perform model calculations.
-
The physical design of a wet pond is largely dictated by the area where the pond is to be established. Still, there are some guidelines in relation to water depth and length of the pool that are good to keep in mind.
The water depth in a wet pond is often chosen to be somewhere between 1 m and 1.5 m. If the water depth is too shallow, there may be a risk of resuspension, i.e. that bottom sediment is stirred up to the water phase or that the basin overgrows. Water depths above 2.5–3 m can result in oxygen depletion on the bottom and the release of substances such as phosphorus into the water phase.
The slopes around a basin can be advantageously laid out in 1:5 or flatter. It ensures that a person can get back up after moving down to the water level. For the same reason, it is also recommended to plant 1:5 below the water surface. If the existing terrain necessitates a slope of e.g. 1:3, it is important to establish a plateau/path or similar at the permanent water table. Alternatively, areas can be planted with shrubs, or fences can be established.
Different values are used for safety factors and correction factors for climate, densification and model uncertainty at the utilities. Most utilities have already decided which safety factors are used, which is why it is recommended that you use these. If you want to know more about safety factors and correction factors.
A wet rainwater ponds must be constructed so that the flow path between the inlet and outlet is as long as possible. A long flow path provides the best purification; therefore it is generally recommended that a basin should be around three times as long as it is wide. This is to avoid short-circuit currents and ensure that there are no dead zones. Inlet and outlet structures should not be built together, and if they are at the same end, a wall/embankment in the pond to lead the water the longest way. By establishing a submerged outlet, it is ensured that the basin acts as an oil separator.
-
Advandages
- Can easily fit into green areas.
- Provides habitats for insects, amphibians and birds -biodiversity
- Provides high recreational value.
- Reduces water velocity to protect the recipient.
Disadvantages
- Requires a lot of space due to the flat slopes.
- Requires a lot of maintenance to retain both the recreational value and the cleansing effect.
Establish a rain garden
A guide developed by City of Tampere, UNaLab project and Ramboll. The guide is developed for private properties in Tampere, but can be useful for stormwater management in different municipalities, too.
-
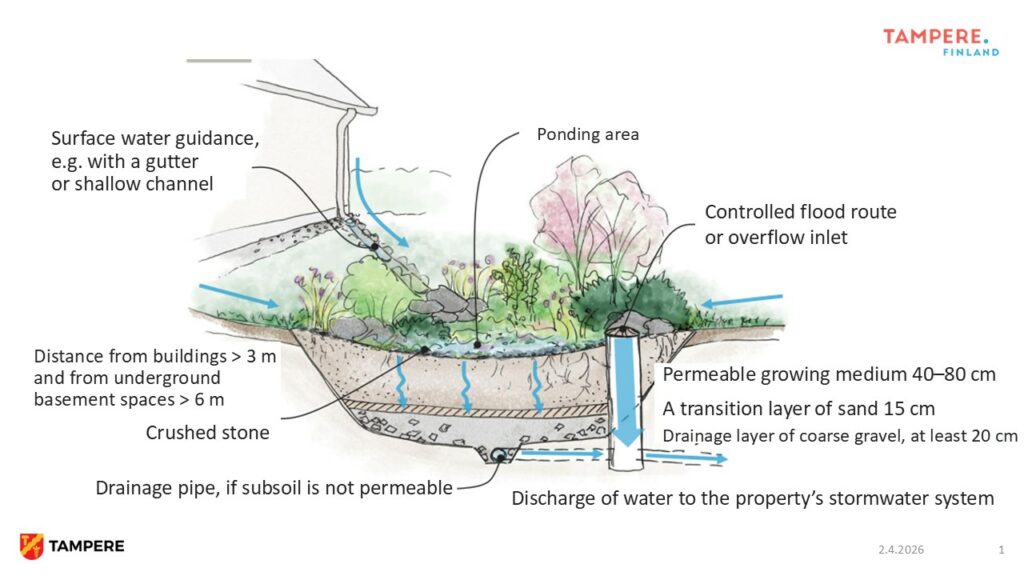
A rain garden is a visually attractive planted area in a yard through which stormwater from the property is directed, for example rainwater collected from roofs and other impermeable surfaces.
A rain garden is a flower bed that requires very little irrigation. It retains a large share of stormwater and the harmful substances carried with it, thereby reducing the load on water bodies.
Plants in the rain garden evaporate part of the incoming water back into the natural cycle, making the rain garden a nature‑based solution for stormwater management. Stormwater detention requirements on a property can be met fully or partially by calculating the ponding volume.
-
Stormwater retention
Rain gardens mitigate challenges related to stormwater conveyance and infiltration by collecting, utilizing and infiltrating stormwater, thereby reducing the load on the stormwater network.
Environmental friendliness
Plants bind impurities present in stormwater that would otherwise be transported via the stormwater system into water bodies.
Low maintenance
The garden requires very little watering, as it stores and recirculates stormwater. However, the first watering in spring is important. Do not fertilize, as one purpose is to purify stormwater. Weeding is generally unnecessary, as rain garden plantings are meadow‑like and grow densely. Plant selection should be based on site conditions to ensure easy maintenance.
Visual appeal
Plants are selected so that greenery remains into autumn and flowering occurs throughout the growing season.
Supporting biodiversity
Native flowering plants support pollinators such as bumblebees, bees and butterflies.
-
When planning a rain garden, check the local zoning plan and building guidelines for applicable requirements. Building control supervises compliance with stormwater detention volumes during construction.
In housing companies, discuss the project with the property manager and shareholders. Consider whether a larger rain garden serving the whole housing company or a specific area could be implemented.
A rain garden must not be placed directly next to a building. Minimum distance: 3 m from building walls and 6 m from underground basements. On sloped plots, locate the rain garden downslope. Also consider neighboring buildings.
Rain gardens can fulfill zoning requirements for stormwater management.
They are often considered sufficient for qualitative stormwater treatment if properly sized. Quantitative detention can be handled partially or fully.Example calculation
Zoning requirement: “Stormwater from impermeable surfaces must be detained on site at a volume of 1 m³ per 100 m² of impermeable surface.”
Impermeable area on the plot: 135 m²
→ Required detention volume: 1.35 m³This can be achieved with a rain garden sized e.g. 3 m × 1.5 m × 0.30 m (effective water depth).
-
Stormwater can be directed into a rain garden using channels or vegetated swales. In some cases, underground pipes may be used if sufficient elevation differences exist. Pumping is not recommended.
Stormwater temporarily ponds in the rain garden, which must therefore form a basin‑like depression. For heavy rainfall, a controlled overflow route must lead water safely onward, for example via a grated catch basin with sediment trap connected to the municipal stormwater network.
If the subsoil is not well permeable, drainage pipes must be installed beneath the soil layers to prevent waterlogging.
-
-
Consider light and moisture conditions on the site.
Edges are drier, lower areas wetter. Plan plant height and root space. Aim for flowering throughout the growing season.
Examples of suitable plants
Cardamine amara, Caltha palustris, Filipendula ulmaria, Iris pseudacorus, Lythrum salicaria, Mentha aquatica, Viburnum opulus, Salix caprea, etc.
Pre‑mixed seed mixes for wet areas are also suitable. -
After regulations are checked and permits obtained, construction can begin.
Key points:
- Manage excavated soil and plant waste responsibly. Is it possible to create landscaping features on the site where the excavated soil can be placed, or will you transport the excavated soil to a waste disposal center? Compost the plant waste. Control any harmful invasive species.
- Store materials and plants safely. Keep
escape routes clear. Store seedlings in a shaded area and remember to water them. - Use native and preferably local plants or seeds.
-
Water and weed during the first two years.
Do not use fertilizers or pesticides.
Leave dried plant stems over winter if desired; cut and compost in spring.
Inspect drainage annually via overflow structures.
Ensure inflow channels and pipes remain functional.Enjoy your rain garden!
Common failures in design phase
General causes of failure
- Lack of governance of legal and participatory frameworks
- Lack of standardization and knowledge of techical design
- Fragmentation of engineering standards and guidelines
- Poor communication among different operators and stakeholders
Technical design failures
- Clogging
- Innacurate estimation of flow pathways
- Insufficient design capacity
- Wrong materials and media
- Not considering correctly environmental and operational fluctuations
- Not considering catchment and impact